As an Amazon Associate I earn from qualifying purchases.
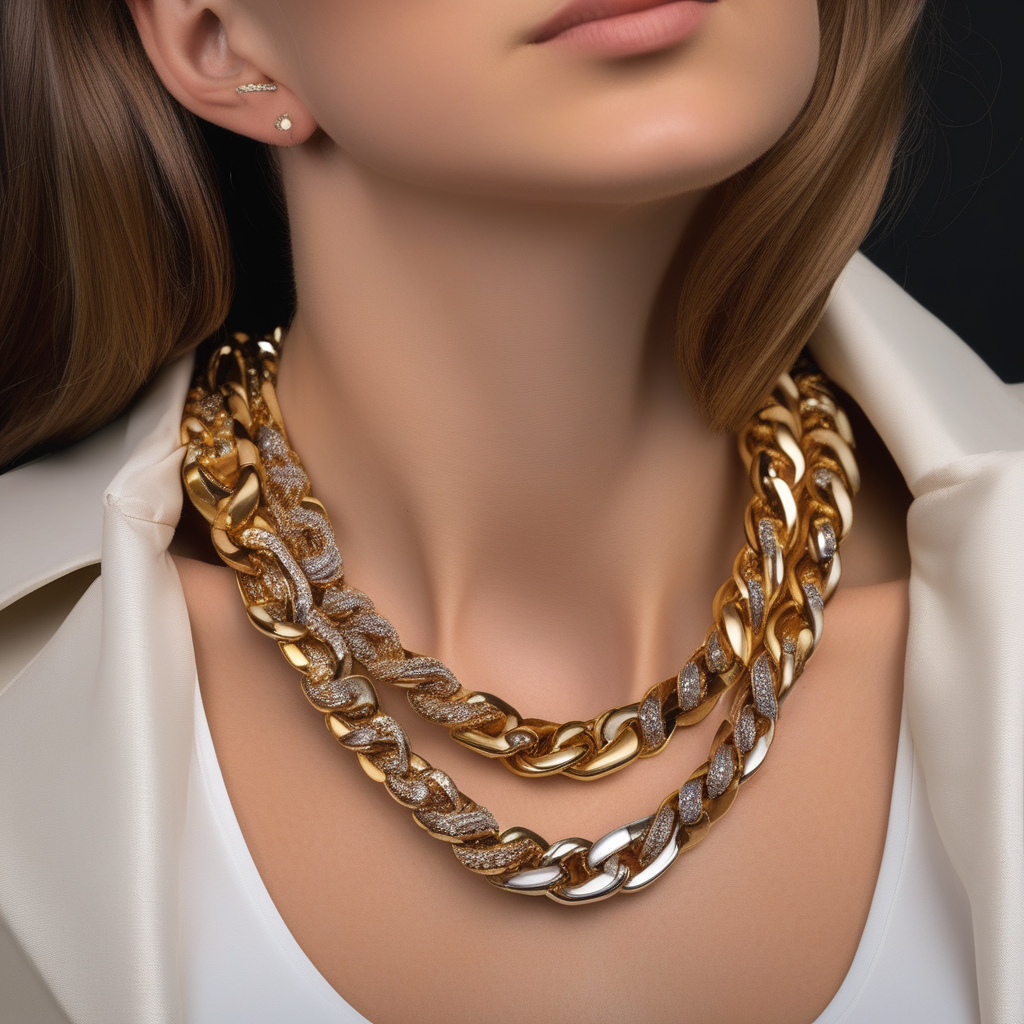
Glistening under the soft light, the chain necklace elegantly nestles against the velvet lining of a jewelry box. Its intricate links, each a testament to the craftsmanship of the jeweler, are interlaced with precision and finesse. But even the most beautiful of necklaces may not always cater to the ideal length desired, often prompting the necessity to shorten them. Traditionally, this would involve cutting the chain, a method that not only risks damaging the piece but is also irreversible.
However, the landscape of jewelry adjustments has changed, introducing methods to modify the length of a chain necklace without the need for cutting. This process, striking a perfect balance between finesse and practicality, allows for a seamless alteration to the length while preserving the integrity of the necklace. It transforms the proverbial stone into an amiable companion catering to personal tastes and preferences. The following article elucidates the step-by-step guide to achieving this balance, ensuring the chain necklace remains a cherished piece in the jewelry collection.
Use a Chain Shortener
Embarking on the journey to manipulate chain lengths begins with the acquisition of a specialized instrument, a chain shortener tool. This intricate device accompanies a set of comprehensive instructions, paramount to mastering its utilization. The subsequent stage involves the artful adjustment of the chain length. This critical process requires precision, enabling the customization of the chain to a preferred length, thereby achieving an ideal fit and personalized aesthetic appeal.
Purchase a chain shortener tool
Shifting gears from the previous discussion, let’s turn our attention to the procurement of a crucial tool for this task: a chain shortener.
The chain shortener tool, a compact and essential gadget, holds great significance in the process of adjusting the length of chains. Its purchase, thus, marks the initial step on the journey of customizing chains to personal preference. This versatile instrument, often manifested in sleek steel or sturdy plastic, is readily available in most local hardware stores. For the convenience of the digitally inclined, a myriad of online platforms also offer a diverse selection, catering to various budgets and quality requirements.
The price of a chain shortener tool can vary significantly, depending on its brand, material, and design. However, don’t let the cost deter you. The investment is worthwhile, considering the tool’s longevity and the freedom it provides in adjusting chains to the desired length.
When purchasing, keeping a keen eye on the tool’s durability and ease of use is advised. A tool with a comfortable grip and user-friendly design can make the chain shortening process not only manageable but also enjoyable. Remember, the chain shortener tool is not an ordinary purchase. It’s the first step in gaining control over the chain length and personalizing it to perfection.
Follow instructions for use
Transitioning from the straightforward task of purchasing a chain shortener tool, attention now shifts to the crucial step of understanding and executing the tool’s instructions for use.
Upon obtaining the chain shortener tool, meticulously examine the accompanying manual that delineates the process of operation. These instructions, invariably written with precision and clarity, serve as an indispensable guide to the successful utilization of the tool.
Begin by examining the tool’s structure; typically, they are equipped with an adjustable crank and a rivet anvil. The anvil often has multiple slots to accommodate chains of varying sizes. Adhere strictly to the prescribed sequence of operation; generally, this involves positioning the chain correctly on the anvil, applying a specific amount of pressure, and turning the crank.
Regardless of the brand or model, the instructions will emphasize safety precautions and guidelines for maintaining the tool’s longevity. Furthermore, they will caution against potential mishaps, such as applying excessive force or utilizing the tool improperly.
In essence, adhering to the instructions not only ensures optimal performance but also safeguards against any potential damage to the chain or the tool itself. Thus, the significance of following the instructions accurately cannot be overstated.
Adjust the length to your preference
Transitioning from the nuances of procuring the chain shortener tool and digesting its instructions, the spotlight now falls on the intriguing aspect of personalization—the act of adjusting the chain length in accordance with personal preference.
Imagine a craftsman carefully calibrating a delicate artifact, the chain shortener tool poised in hand, ready to metamorphose the chain into a piece of perfection tailored to the beholder’s desire. One must remember that the ultimate goal here is to achieve harmony between the chain’s length and the individual’s taste.
Imagine a necklace, perhaps no longer dropping low and uncontrolled but instead resting gently against the collarbone, accentuating the neck’s graceful curvature. Or, consider a pocket watch chain shortened to an ideal length, allowing it to swing with a rhythmic sway rather than an ungainly lurch.
To achieve this, one must first lay out the chain on a flat surface, allowing for a clear assessment of its length. Then, with the chain shortener tool at the ready, take a moment to visualize the desired length. With steady hands and a focused mind, engage the tool, securing the chain in its tight grip. Carefully, with precision and patience, begin the process of modification.
Add a Necklace Extender
After careful selection of a necklace extender that complements the piece, attention turns to the delicate task of attaching the extender to the necklace’s clasp. With utmost precision, the extender must be fastened securely, ensuring a seamless fusion between the necklace and the extension. Following this, the length adjustment process begins, a meticulous task that requires finesse. The end goal is to achieve the desired length that not only enhances the beauty of the necklace but also provides an optimal fit for the wearer.
Purchase a necklace extender
Moving gracefully from the delicate intricacies of chain shortening, we now turn our attention to the equally valuable concept of necklace extenders. Imagine a beautifully detailed pendant necklace that unfortunately falls just a tad short of the desired length. The solution rests not in discarding this piece but rather in the acquisition of a necklace extender.
When embarking on the journey of purchasing a necklace extender, it’s critical to consider the type of necklace in question. A variety of extenders exist on the market, designed to cater to the diverse range of necklace styles. From delicate, barely-there extenders for minimalist chains to robust, ornate extensions for statement pieces, the choices are vast.
The material of the necklace and extender should ideally match to maintain a seamless aesthetic. Gold, silver, and stainless steel extenders are commonly available options. For those wishing to maintain a strict budget, affordable metal alloys can also serve the purpose adequately without compromising the look.
Ensure the extender possesses a sturdy, functional clasp that aligns with the necklace’s existing clasp. This will ensure ease of attachment and detachment and provide the necessary security to keep the necklace in place.
Attach the extender to the clasp
Transitioning from the art of shortening a necklace, the discourse now advances to the much-anticipated consideration of extending one. The topic under discussion is a crucial element to consider when personalizing necklace length: attaching an extender to the clasp.
Imagine a tiny yet highly effective gadget that can revolutionize the way necklaces drape. That’s the magic of a necklace extender. To attach it, begin by locating the necklace’s clasp, that small but intricate device responsible for holding your prized possession firmly around your neck.
With the precision of a jeweler, hold the extender’s loop in one hand and the necklace’s clasp in the other. Gently, but securely, clip the extender’s loop into the necklace’s clasp, ensuring that the connection is firm and unyielding. It may take a few attempts to master this skill, but patience will yield success.
Like a craftsman, one must work with diligence and care, navigating this delicate process with the utmost precision. Once the extender is securely attached, the necklace is transformed, now possessing the ability to adjust to a longer length, offering a new range of styling possibilities.
Adjust the length as needed
Transitioning from the snug fit of a shortened chain to the freedom of an extended one, the journey now arrives at the crucial stage of adjustment. Picture a canvas where every brush stroke alters the overall aesthetic; similar is the act of adjusting the length of the necklace extender. A delicate process that requires precision and keen attention to detail, akin to the subtle placement of the final piece in a jigsaw puzzle.
Upon securing the necklace extender to the clasp, an array of possibilities opens up. Imagine a symphony of length adjustments, each creating a different vision of elegance and style. The slightest change can transform the entire look, just as the moon alters the tides.
As the extender chain slides through the fingers, one will feel a sense of control. A gentle tug or a slight release can effortlessly lend the desired length. Like the skilled hands of a tailor meticulously adjusting the hem of a garment, the necklace extender allows for personalized customization. The power to alter the fall of the necklace rests in the wearer’s hands, creating a harmonious blend of comfort and style.
Remember, perfection lies in the details. So, take the time to adjust the length as needed, creating a masterpiece that enhances the beauty of the wearer.
Use Hair Clips
Effortlessly securing the surplus length of hair provides a sophisticated and tidy appearance; hair clips serve as the perfect tool to achieve this. When placed with care, the clips become inconspicuous, hidden behind the neck, enhancing the overall look without drawing attention. For those seeking a temporary solution for shorter wear, clips offer the versatility and ease of transforming long tresses into a shorter style in mere minutes, adding a touch of elegance and practicality to any hairdo.
Secure the excess length with hair clips
Shifting gears from the artful extension of necklaces, let us delve into the realm of hair clips, a humble accessory with an unforeseen utility. To begin, consider the topic of securing the excess length with these unassuming tools.
Picture this: A cascade of silky, vibrant hair falls freely down the back. But it comes with a drawback: the excess length that might get in the way of daily activities. Enter the unsung heroes of hair accessorizing—hair clips. These tiny marvels, often overlooked, hold the power to rein in the unruly strands and secure them in place with an effortless grace.
Commence by gathering the excess length of the hair into a loose, low ponytail. Carefully select a sturdy hair clip, one large enough to hold the gathered hair. Open the clip and place it around the base of the ponytail, ensuring it securely fastens the hair and provides a firm grip without causing discomfort.
The hair clip should be positioned in such a way that it doesn’t cause any tugging or pulling, which may lead to hair breakage or scalp discomfort. Remember, the goal is to secure the excess length, not to create additional problems. This simple yet effective method provides a practical solution for managing the excess length.
Hide the clips behind your neck
Moving on from the world of necklace extenders, let’s delve into the realm of hair clips, a versatile accessory that can enhance not only hairstyles but also necklace lengths. This section specifically focuses on how to effectively hide these clips behind the neck, ensuring a seamless look.
Imagine a beautifully coiffed head of hair, seemingly magically held in place. The magic, in this case, is hair clips, cunningly concealed behind the neck. To achieve this, choose clips that match the color of the necklace or the outfit. This color coordination will help blend the clip into the overall aesthetic, rendering it invisible to the casual observer.
Next, attach the clip to the excessive length of the necklace, and then secure it to the nape of the hair. Aim for the lower part of the hairline, where the hair is denser, as this makes it easier to hide the clip. Ensure the clip is securely fastened to avoid it slipping off during the day.
The final step involves arranging the hair to cover the clip. Longer hair can simply be let loose to fall naturally over the clip, whereas shorter hair might require a bit of styling to ensure the clip remains hidden. Following these steps meticulously will ensure the hair clips become invisible anchors, providing a seamless, professional look.
Create a temporary solution for shorter wear
Transitioning from necklace extenders to another ingenious solution, allow the focus to shift to the realm of hair accessories. Nestled in this domain are hair clips, versatile in function and style, that can also serve as a temporary solution for shorter wear.
Imagine a situation where the necklace is too long for a certain outfit or occasion. In such cases, resorting to the humble hair clip can provide a swift, temporary solution. Swiftly twist the excess length of the necklace and secure it with a hair clip. The butterfly clip or a plain barrette both work effectively to hold the necklace length in place. The beauty of this approach lies in its simplicity and adaptability. It doesn’t require any permanent alterations, thus preserving the original length of the necklace for future use.
However, it’s vital to ensure the clip used is sturdy and reliable, as it holds the responsibility of managing the necklace’s length. Opt for metal clips over plastic ones to ensure a firm grip. The clip should blend with the chain’s color and design to maintain aesthetic harmony.
This temporary solution provides a quick fix, enabling the wearer to adjust the necklace length to suit different outfits and occasions.
Knot the Chain
Initially, meticulously construct a compact knot at the preferred length, a critical step in securing the chain. This knot must be steadfast, holding firm under the potential strain of daily wear. Finally, artfully conceal the knot for aesthetic purposes, either behind the nape of the neck or subtly nestled within the pendant. This cleverly maintains the chain’s elegance while ensuring its stability.
Create a small knot at the desired length
Transitioning from the artful use of hair clips, let’s shift our focus to the innovative technique of knotting a chain. Imagine the chain as a delicate thread, a shimmering line of silver or gold waiting to be manipulated into a unique form.
To begin, select a spot along the chain that aligns perfectly with the desired length. Picture that length on your neck, a subtle drop of sparkle, or a bold statement piece; the choice is yours. The next step requires a steady hand and a keen eye. Isolate the chosen spot and start to twist the chain into a loop, then pass the end of the chain through the loop. Imagine the chain twisting upon itself, two strands becoming one, creating a small knot.
Perfection lies in the details. Focus on the size and tightness of the knot, ensuring it’s neither too loose to slide nor too tight to damage the chain. Imagine a perfectly formed knot, small and discrete, a secret only you know about.
This intricate process of knotting a chain not only adjusts its length but also adds a personal touch, transforming a simple accessory into a unique piece of wearable art.
Ensure the knot is secure
Transitioning from the delicate art of using hair clips, we now delve into the realm of jewelry manipulation, specifically, knotting a chain. Ensuring the security of the knot is at the heart of this procedure.
Imagine a chain necklace, its surface gleaming with a soft metallic sheen. You’ve deftly created a diminutive knot at the desired length. Now, the task at hand is to ensure its stability. Begin by applying gentle pressure to the knot, cautiously testing its resistance. The solidity of the knot under this pressure determines its security. If the knot holds firm, the task is accomplished. If it loosens, repeat the knotting process with increased force.
Delicate fingers then employ the use of a magnifying glass to scrutinize the knot, ensuring no weak links compromise its structure. The magnifying glass reveals the intricate details of the knot, allowing for any potential flaws to be identified and rectified.
A pair of fine-tipped pliers might aid in this process, providing the necessary precision and control to adjust the knot. The final task lies in ensuring the knot is tight enough to bear the weight of the pendant, if applicable, without compromising the chain’s integrity.
Hide the knot behind your neck or within the pendant
Moving from the simple yet stylish use of hair clips, we now delve into an equally fashionable practice: knotting the chain. A useful technique that adds a distinctive flair to any outfit, the artful concealment of the knot can truly set the style apart. Here, the focus lies on the careful camouflaging of the knot, either behind the neck or nestled in the pendant.
The primary objective is an aesthetically pleasing look that takes advantage of the inherent versatility of the chain while retaining the essence of subtlety. As with any fashion technique, the key lies in the details. The knot, once securely tied at the desired length, should be completely hidden from view. If the chain is worn around the neck, placing the knot behind the nape can ensure a seamless look.
If the chain boasts a pendant, consider nestling the knot within its curves. This strategy not only keeps the knot concealed but also adds an unexpected twist to the pendant’s design. The resulting look is a harmonious blend of style and function, with each element playing a vital role. Remember, the knot should not detract from the overall aesthetic but rather enhance it, adding depth and character to the chain. With practice and precision, the art of knotting and hiding the knot can truly elevate any ensemble.
Use Jewelry Wire
Initiate the process by elegantly threading the jewelry wire through the intricate links, establishing a harmonious connection between each component. Subsequently, forming a loop at the desired length manifests the envisioned design, giving it a tangible structure. Lastly, secure this crafted loop, ensuring its stability and longevity. Trim any excess wire, a final touch that emphasizes precision and cleanliness, resulting in the creation of a beautifully crafted piece radiating elegance and individuality.
Thread jewelry wire through the links
Transitioning from the meticulous process of knotting the chain, the next phase involves the introduction of jewelry wire. This metallic string plays a pivotal role in the creation of a personally designed piece of jewelry.
In this initial step, an appreciation for the fine art of threading becomes evident. The jewelry wire, slender and pliable yet strong, finds its path through the previously knotted chain links. Each link, with its own unique shape and size, welcomes the wire in a harmonious union of metal elements. As the jewelry wire snakes its way through the links, it weaves a path of connectivity, binding the disparate pieces together.
Imagine a river meandering through a scenic landscape, each bend and twist defining the terrain it traverses. Similarly, the jewelry wire threads its way through the chain links, the path dictated by the size and shape of each link.
Patience and precision find their place in this phase as well. Careful manipulation of the wire ensures that it does not snag or warp the delicate links. The deftness of a skilled jeweler ensures the wire’s smooth passage, creating a seamless integration of the chain and the wire. This is the art of threading jewelry wire through the links, a testament to the jeweler’s skill and patience.
Create a loop at the desired length
Transitioning from knotting the chain, the next step involves the intricate process of forming the loop. Imagine the jewelry wire as a serpent, coiling itself into a perfect circle. The length of this loop is critical and depends on personal preference. The creation of the loop serves as the main anchor point for the pendant or charm that adorns the jewelry piece.
To form this crucial loop, carefully bend the jewelry wire to create a circle of the desired size. Precision is paramount here; a loop too large can appear awkward and affect the overall aesthetics, while a loop too small may not accommodate the chosen pendant. A pair of round-nose pliers comes in handy for this step, providing the leverage and control needed to shape the wire into a perfect circle.
The wire should coil around the nose of the pliers, the metal bending willingly under the applied pressure. Slowly, a loop begins to take form. The sense of satisfaction that comes from seeing the desired loop come into existence is palpable. Remember, patience and delicate manipulation are key to achieving a loop that is symmetrical and smooth, a testament to fine craftsmanship.
Secure the loop and trim any excess wire
Having mastered the art of knotting the chain, the next critical step lies in securing the loop and trimming any excess wire. Precision and care become the paramount keys to success in this phase.
To secure the loop, grasp it firmly with a pair of needle-nose pliers. Hold the loop steady, and wrap the remaining wire around the base of the loop, just above the bead or charm. The wire must coil cleanly around the loop’s base; this will provide the stability required for the jewelry piece. Continue to wind the wire until it rests snugly against the bead, leaving no space for movement.
Now, trim any excess wire. A sharp pair of wire cutters will ensure a clean cut and minimize any risk of leaving sharp edges that could snag on clothing or skin. Clip the wire as close to the base of the loop as possible. Afterwards, inspect the trimmed end carefully. If any sharp points remain, use a metal file to smooth them down. A flawless finish devoid of any obvious wire-end imperfections is the aim here.
With this, the loop is not just secure but also aesthetically pleasing, creating a professional and polished finish to the jewelry piece.
Visit a Jeweler
First, visiting a professional jeweler illuminates the intricate world of fine jewelry, offering priceless insights on the art of necklace alteration. Delving into non-permanent options unearths an array of solutions that allow for short-term changes, preserving the original length of the necklace. Moreover, exploring custom solutions caters uniquely to individual needs, delivering a superior degree of personalization. These three subtopics form a triptych of valuable knowledge for anyone seeking to adjust their necklace length.
Consult a professional jeweler
Transitioning from the realm of do-it-yourself, the uncharted world of professional jewelers beckons. Venturing into this world means seeking the expertise that only a trained jeweler can provide.
In the heart of a bustling city or a quiet town, a jeweler’s shop stands as a sanctuary of sparkle, filled with an array of gleaming ornaments, each meticulously crafted. The scent of polished metal and the soft hum of intricate machinery fill the air as one steps into this treasure trove.
The jeweler, a master of their craft, greets each customer with a warm smile, their hands telling tales of countless hours spent shaping, cutting, and polishing precious metals and gemstones. Their sharp and knowing eyes possess the ability to discern the value and quality of a piece at a single glance.
Consulting a professional jeweler provides a unique perspective and advice rooted in years of experience and knowledge. Their understanding of materials, techniques, and current trends, combined with their keen eye for detail, make them invaluable guides in the journey of necklace alteration. From the simplest to the most complex modifications, a jeweler’s expertise will ensure a solution that marries beauty, craftsmanship, and personal style.
Discuss non-permanent options for shortening
Bidding adieu to the delicate finesse of jewelry wire, we now plunge into the realm of expert hands, those of the professional jeweler. The hushed whispers of anticipation fill the air as we approach the topic of non-permanent options for shortening necklaces.
Consider the scenario: the necklace that once graced the collarbone with perfect precision suddenly hangs too low. A non-permanent solution offers a delightful reprieve. The expert jewelers, with their meticulous precision and seasoned dexterity, employ necklace shorteners. These ingenious devices, usually characterized by a metallic ring with a spring clasp, attach to the necklace, allowing for adjustable length.
Picture the delicate dance of a jeweler fastening the spring clasp onto the necklace chain with ease, born of years of intricate work. The necklace, now redefined, sits perfectly once more, as if magically transformed. The beauty of this non-permanent solution lies in its flexibility, allowing for a seamless transition between lengths as desired.
In the realm of jewelry, this non-permanent shortening method paints a picture of adaptability and customization, much like the jeweler who wields it.
Explore custom solutions for your specific necklace
Transitioning from the hands-on approach of using jewelry wire, the landscape now changes to the polished counters and glass displays of a professional jeweler’s store. Here, custom solutions for the unique necklace that graces your neck can be discovered.
An expert jeweler, with years of experience etched into their skilled hands, can become an invaluable partner in creating a bespoke solution tailored just for you. They examine the necklace, their eyes catching the specific nuances that make it special. The length, the weight, and the intricate designs embedded within are all taken into consideration.
In this realm, innovation and creativity intertwine with traditional craftsmanship to breathe new life into your necklace. A variety of techniques and materials are available, all waiting to be employed to meet your specific needs. Perhaps a delicate clasp alteration might suffice, or maybe a full-scale reworking of the chain is needed.
The jeweler, acting as both consultant and artist, will provide a range of options, each one reflecting a potential path to a necklace that not only fits you perfectly but also maintains its original charm. In their capable hands, your necklace is not merely an accessory; it becomes a masterpiece, tailored to fit your style and needs.
Layer the Necklace
Delving into the art of necklace layering, first consider pairing a long necklace with a shorter one. This juxtaposition creates a dynamic visual balance, evoking a unique style statement. Next, focus on creating a layered look. Skillfully stacking necklaces of varying lengths and styles adds depth and dimension to your ensemble. Lastly, to simulate the illusion of a shortened necklace without modifying the original, cleverly loop or knot the long necklace. This sophisticated technique not only preserves the necklace’s integrity but also adds a touch of innovation to your look.
Pair the long necklace with a shorter one
Emerging from the jeweler’s shop, a newfound elegance draped around the neck—a long, delicate necklace, glinting under the soft streetlight. The perfect next step: pair this lengthy beauty with a shorter companion.
A shorter necklace, perhaps a choker or a collar, serves as an ideal accomplice. Its proximity to the neckline naturally draws the eyes upward, enhancing the facial features while simultaneously allowing the longer necklace to command its own spotlight. This partnership creates a duet of shimmering metallic tones, each piece singing its part yet harmonizing together to create a symphony of elegance.
It’s a dance of attention; the shorter necklace leads, while the long one follows, elongating the neckline and creating a captivating cascade of jewels and metals. Picture a simplistic gold pendant choker coupled with a lengthy silver lariat; their contrast creates a beautiful clash of colors.
Choosing the right duo is an art in and of itself. The shorter necklace should have a thicker chain or a larger pendant to create balance against the slender grace of the longer necklace. This combination adds variety and depth to the look, enhancing the unique beauty of each piece while creating a stunning, layered effect.
Create a layered look
Emerging from the jeweler’s shop with a new long necklace in possession, it’s time now to unlock its potential. Creating a layered look, a design technique that adds depth and dimension, serves as the ideal approach.
Imagine two or more necklaces, each with their own charm, twined together to create a harmonious visual symphony. The long necklace, the newly acquired jewel, forms the foundation of this layered look. Its length allows for flexibility and creativity, acting as a canvas for the shorter necklace to be paired with.
Consider the interplay of elements: the longer necklace’s pendant, the shorter necklace’s gems, and the subtle contrasts and complements that form when they meet. They dance around each other, their metallic chains intertwined in a delicate ballet of luster and sparkle, creating a richly textured display of elegance.
The layered look, an embodiment of sophistication and style, transforms the long necklace into a versatile accessory. It lends a certain depth to the ensemble, a sense of complexity that draws the eye and captivates the mind. And with this, an ordinary necklace becomes a statement piece, its beauty amplified, and its potential fully realized.
Achieve the appearance of a shorter necklace without altering the original
Emerging from the jeweler’s shop, the allure of the long necklace glimmers in the sunlight. Its delicate craftsmanship allows it to rest gracefully on the chest, although its length may seem overwhelming to some. But fear not, for there is an artistry to making it appear shorter without compromising its original structure.
The secret lies in the clever technique of looping. Securely hold the necklace in its middle, forming a loop, and then fasten it around the neck. This creates the illusion of two shorter chains, each glinting independently yet harmoniously linked. The result is a transfixing spectacle of light as the necklace’s pendants dance together, casting mesmerizing shadows on the wearer’s chest.
Another method to consider involves the use of a ribbon or a brooch. Simply gather a section of the necklace, tie it with the ribbon, or pin it with the brooch to create a charming knot. This gives the necklace a shorter appeal while adding a touch of elegance and sophistication.
Remember, the goal is not to alter the necklace’s original length but to manipulate its appearance in a way that best suits the occasion or outfit. It’s a game of optical illusions, where creativity meets style, and a long necklace transforms into a versatile accessory.
Use a Necklace Tuck
To master the art of the necklace tuck, three straightforward steps must be carefully executed. Initially, the excess chain length is discreetly stowed beneath clothing, adding a touch of modesty to the ensemble. Following this, the chain requires securing, ensuring the necklace remains comfortably in place regardless of movement or activity. Finally, a hidden and temporary solution for shorter wear is crafted, enabling the wearer to effortlessly switch between different necklace lengths, thus offering versatility and adaptability to any outfit.
Tuck the excess length under your clothing
After venturing forth from the meticulous process of layering the necklace, the next step illuminates the art of the necklace tuck. This technique, often overlooked, serves to maintain the elegance of your accessory ensemble by neatly concealing any excess chain length under the clothing.
Imagine a long, shimmering necklace chain gracing your neckline, the excess length cascading past its desired limit. Rather than letting this surplus hang aimlessly or resorting to a hasty and unsightly knot, employ the refined technique of the necklace tuck.
Imagine gently lifting the hem of your outfit, perhaps a lovely silk blouse or a chic cashmere sweater. With an air of grace and precision, guide the lingering necklace chain, tucking it subtly underneath. Picture the chain disappearing from view, its excess length now cleverly hidden within the folds of your attire.
In this manner, the necklace tuck cultivates a cleaner, more polished look by eliminating potential distractions caused by a surplus chain. The focus remains on the beautifully layered necklaces, setting the stage for your overall ensemble to shine. Hence, mastering the necklace tuck becomes crucial in ensuring the visual harmony of your accessory presentation.
Secure the chain in place
After adorning the necklace with grace, securing the chain in place becomes the next significant step to ensure an impeccable look and prevent any mishaps. Involving both subtlety and precision, this process can be mastered with a touch of patience and practice.
Imagine a silver chain, its cool metal links shimmering in the light, gently resting against a black silk blouse. The excess chain, rather than hanging loosely, needs to be firmly tucked and secured. Start by clasping the necklace’s end. Feel the tiny, intricate latch beneath the fingertips and gently close it around the desired link. This step ensures the necklace perfectly sits in the intended position, neither too tight nor too loose, just a comfortable fit against the skin.
Now, observe the remaining chain. Instead of letting it dangle haphazardly, coil it carefully, creating a neat little bundle. Use a small piece of clear tape or a safety pin to stabilize this coiled section, ensuring it stays in place discreetly without drawing unwanted attention.
Securing the chain in place not only guarantees a flawless look but also protects the precious piece from potential damage. This step, though seemingly small, plays a crucial role in presenting a refined, elegant appearance.
Create a hidden and temporary solution for shorter wear
Having layered the necklace with precision, attention now turns to crafting a hidden and temporary solution for shorter wear. Expert hands deftly manipulate the chain, looping it to reduce the length. The attention to detail pays off, resulting in a chic, shorter necklace that sits just right on the collarbone.
In the world of style, versatility reigns supreme. This clever modification of length allows the same necklace to cater to various outfits, switching from a long, dramatic piece to a shorter, subtler accent in a matter of seconds.
The artistry involved in this technique lies in the subtlety of the change. Done well, the transformation appears seamless. The shortened necklace gives no hint of its potential length, maintaining the illusion of a separate piece of jewelry. Quick, temporary, and completely reversible, this method offers an innovative solution to achieving varied looks with a single accessory.
The hidden loop of the necklace, concealed beneath clothing, presents an elegant solution to the challenges of versatility. This technique, a combination of creative thinking and practical skills, paves the way for endless styling possibilities. The traditional rules of jewelry wear evolve, making room for innovation and personal expression.
Conclusion
In the realm of jewelry modification, diverse options exist that allow for a necklace chain to be shortened without resorting to permanent alterations. Techniques such as employing a chain shortener, integrating an extender, utilizing hair clips or jewelry wire, knotting the chain, engaging the help of a jeweler, layering the necklace, or tucking it provide ample solutions.
These methods epitomize ingenuity and practicality, giving necklace owners an array of choices to perfectly style their jewelry to their liking. The beauty of these techniques lies not only in their simplicity but also in their capacity to preserve the integrity of the necklace chain. No need to mar the chain with irreversible cuts; these methods promise impeccable results with zero damage.
As an Amazon Associate I earn from qualifying purchases.
Leave a Reply