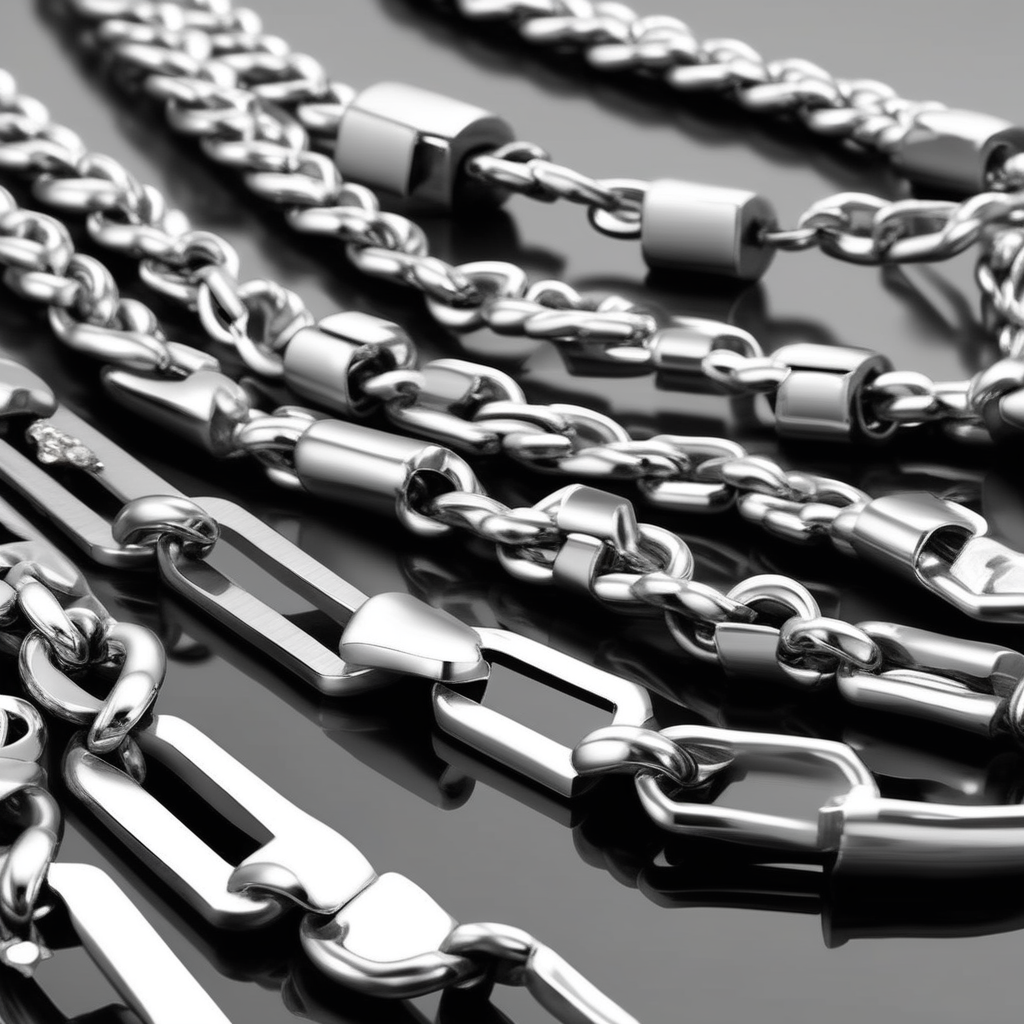
Nestled between precious gems or intertwined within the intricate mesh of gold and silver, tresses of hair often find their way into the delicate links of necklace chains. Despite the radiance of these adornments, the stubborn strands of hair, once entangled, can mar their beauty, diminishing their luster and elegance. The task of eliminating these unwelcome intrusions, although seemingly daunting, can be accomplished with a few strategic steps and the right tools.
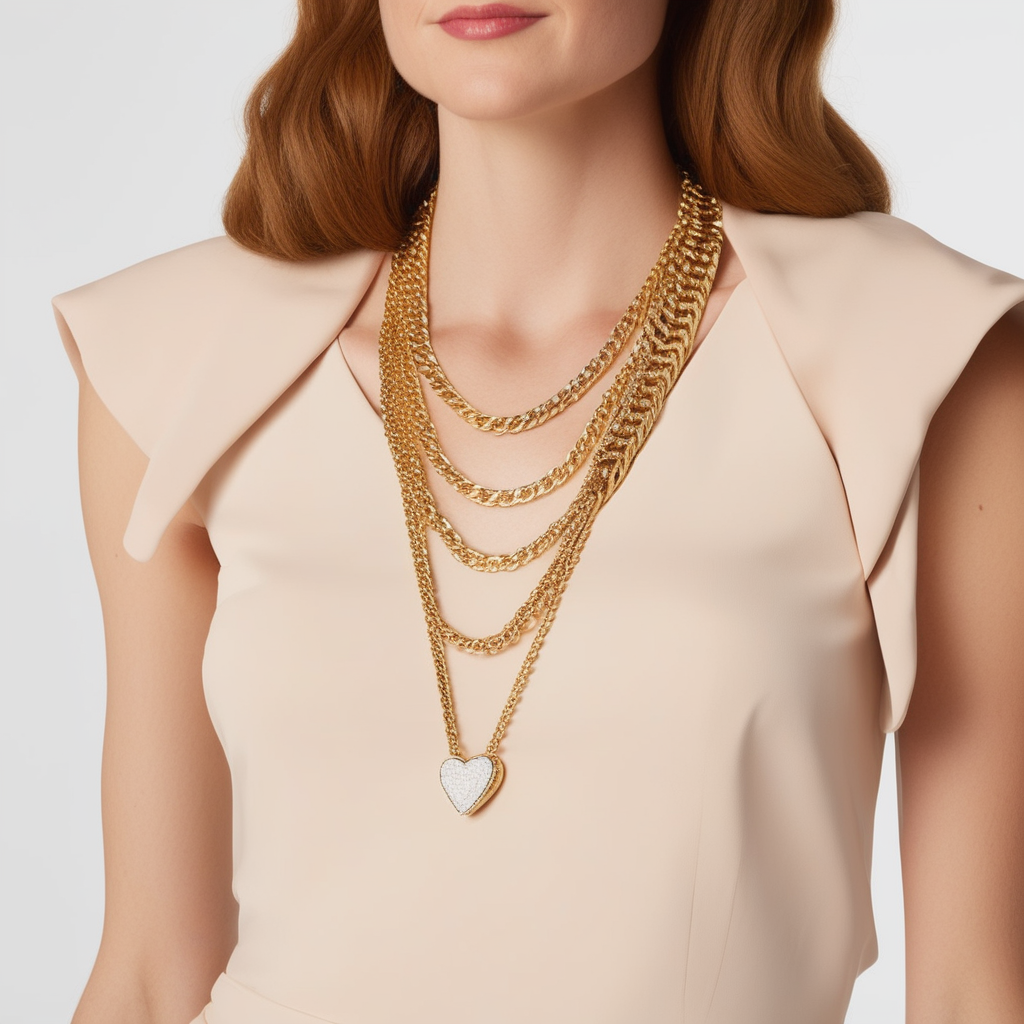
Imagine a serene Sunday afternoon, the sunlight casting a warm glow on the beloved necklace resting on the table. It’s a cherished piece, a symbol of a significant memory, or perhaps a treasured inheritance. But there, within the delicate intricacies of the chain, lie entwined strands of hair. Their presence tarnishes the necklace’s aesthetic appeal, turning the once-sparkling accessory into a less appealing version of its former self. This scene sets the stage for a journey, a step-by-step guide to navigate the delicate process of removing hair from a necklace chain. The mission is to restore the necklace to its original, captivating beauty.
Gather Your Supplies
Begin by assembling tools such as toothpicks, tweezers, baby oil, vinegar, and a soft cloth. This eclectic collection is essential for the intricate task ahead. Moving on, an understanding of the appropriate cleaning solutions is paramount; baby oil and vinegar provide gentle, effective options. Finally, preparing a workspace that is clean and clutter-free ensures a streamlined process and safeguards against potential damage or misplacement of items. A well-prepared workspace echoes the professionalism of the task, setting the stage for a successful cleaning endeavor.
Gather Toothpicks, Tweezers, Baby Oil, Vinegar, and a Soft Cloth
Transitioning from the fundamental understanding of why cleanliness is essential, let’s now embark on the enjoyable journey of gathering the necessary supplies. The first stage of preparation demands the collection of some seemingly ordinary items: toothpicks, tweezers, baby oil, vinegar, and a soft cloth. Each of these items, although commonplace in every household, will serve a specific purpose in the cleaning process.
Imagine an array of toothpicks, their sharp ends pointing towards the sky, ready to dig into those hard-to-reach corners and crevices. Equally useful, tweezers stand by, their slender arms prepared to pick up minute particles that resist capture by ordinary means. Then, there’s baby oil—a glossy liquid that not only cleans but also imparts a lustrous shine to the objects.
In contrast to the oil’s sleek shine, vinegar offers its powerful cleansing properties, ready to cut through stubborn grime and deposits. Last but certainly not least, envision a soft cloth, its plush texture ready to wipe away all that the toothpicks, tweezers, oil, and vinegar have loosened. Gathering these supplies marks the first practical step in the cleaning process, a step that brings you one step closer to immaculate items that gleam with cleanliness.
Selecting Appropriate Cleaning Solutions
Transitioning smoothly from the initial gathering of necessary tools, the focus now shifts towards selecting the appropriate cleaning solutions. A crucial step in the process, it ensures the effective and safe cleaning of the item, protecting it from potential damage.
Imagine a plethora of cleaning solutions, each designed for a specific purpose, lined up on a shelf. The sight can be overwhelming, but fear not. Begin with the basics: baby oil and vinegar. Baby oil, mild and gentle, proves excellent for cleaning sensitive surfaces without causing harm. Its slick nature allows it to seep into tiny crevices, loosening accumulated grime.
On the other hand, vinegar, a natural disinfectant, excels at removing stubborn stains and killing bacteria. Its acidic properties make it a formidable cleaner, capable of dissolving mineral deposits and polishing surfaces to a gleam. However, caution must be exercised when using vinegar due to its potentially corrosive effect on certain materials.
The selection of cleaning solutions, though seemingly straightforward, plays a pivotal role in the cleaning process. The wrong choice could result in irreparable damage, highlighting the importance of thoughtfulness in this decision. With the right tools and solutions at hand, the stage is now set for preparing a clean workspace.
Preparing a Clean Workspace
Embracing the tranquility that comes from a well-organized space, let the focus now shift to preparing a clean workspace. Imagine a sanctuary, free from distractions, where each item has its place and purpose.
Begin by selecting a flat, stable surface that is spacious enough to accommodate the necessary supplies. A broad table, preferably of a non-porous material, would serve admirably. The chosen locale should be well-lit, allowing for a clear, unobstructed view of the task at hand.
Next, clear the space of any unnecessary items. Clutter can be an impediment to productivity and efficiency, so ensure that only the tools needed for the task remain. Toothpicks, tweezers, baby oil, vinegar, and a soft cloth should find their place in this workspace, each within easy reach.
Cleanliness remains paramount. Clean the chosen workspace using a mild, non-abrasive cleaner, wiping it down until it gleams. Any dirt or dust can interfere with the cleaning process, so meticulousness at this stage will pay off later.
Lastly, arrange the supplies in a manner that suits the workflow. A logical, intuitive layout can streamline the process, increasing efficiency and reducing the chance of mistakes.
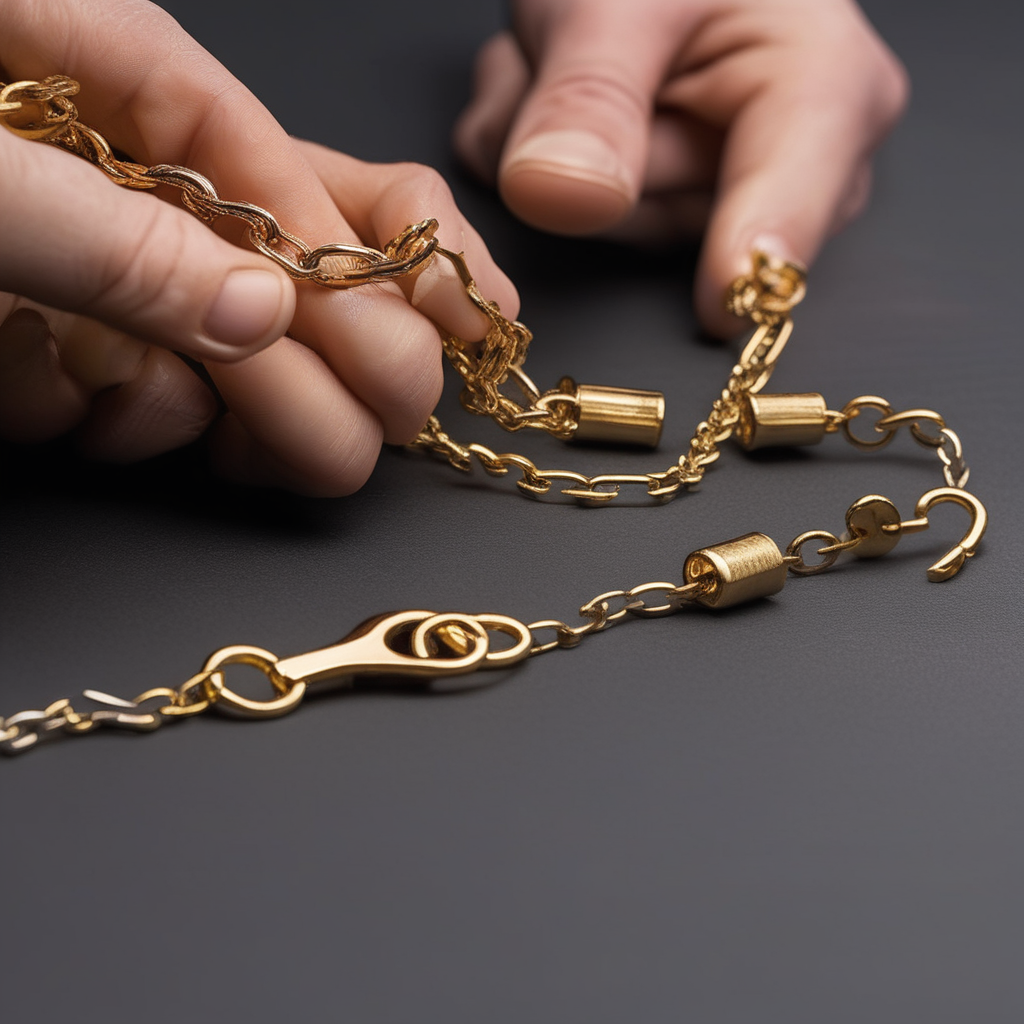
Lay Out the Necklace
Having gently placed the necklace on a pristine surface, the focus shifts to identifying the precise area entangled with stray hairs. This careful scrutiny necessitates a well-illuminated space, ensuring no knot goes unnoticed. Once located, the necklace is then repositioned on the flat surface, arranged in such a way that allows for meticulous untangling. This systematic approach significantly aids in preserving the jewelry’s integrity while attempting to free it from hair’s clutches.
Lay the Necklace Flat on a Clean Surface
Transitioning from the preparatory stage of gathering supplies, the heart starts to flutter with anticipation at the prospect of restoring the beloved necklace to its original glory.
A clean, flat surface is of utmost importance. An immaculate table, perhaps, or a large ceramic tile bathed in soft, natural light, proves ideal. The surface, gleaming under the soft rays of sunlight, serves as a sterile stage for the delicate operation.
The necklace, shimmering with hidden beauty beneath the entanglement, is laid out with a gentleness that mirrors the affection it symbolizes. Its slender chain, now marred by clumps of hair, spreads out like a river of gold, its course disrupted by unsightly debris. The pendant, perhaps a heart or a tiny locket, rests beside it, dulled by the unsettling mess.
The fingers, steadied by a sense of purpose, laid the necklace down. The intricate patterns and delicate links of this precious adornment are now spread out, ready for their transformation. The necklace, lying flat, seems to breathe a sigh of relief, ready for the tender ministrations that will restore its former luster.
In the quiet room, the stage is set, the necklace is laid out, and the journey of restoration is ready to commence.
Finding the Area with Hair Entangled
Transitioning from the preparation stage, the task now enters a more serious realm. A sense of anticipation fills the air. The necklace, once a symbol of beauty and elegance, now lies flat on a pristine surface.
Delicately, the necklace presents itself, resplendent in its craftsmanship yet marred by the entanglement of hair. The strands of hair have woven themselves into the intricate design, creating a tangle that marred the necklace’s once flawless beauty. This is the area of focus, the epicenter of the mission at hand.
The sight of the hair entangled in the necklace’s links can be disheartening. The distinct contrast between the gleaming metal and the dull strands of hair creates a stark image. The intricate dance between the hair and the necklace might seem like a daunting sight to an untrained eye. However, with the right tools and a determined spirit, even this formidable task can be conquered.
In the quiet stillness, the careful observer can discern the areas where the hair has wound itself tightly around the necklace’s links. These are the battle zones. The mission is clear: to restore the necklace to its original glory. The journey may be challenging, but the reward is invaluable. The task is set. The battleground is ready.
Positioning the Necklace on a Flat Surface
Transitioning from the gathering of supplies, attention now turns to the crucial step of positioning the necklace on a flat surface. The surface chosen should be clean, clear of clutter, and stable. A flat surface ensures that the necklace lies completely flat without any bends or twists, which could further entangle the hairs.
Imagine a pristine white table, its surface unblemished and gleaming under the soft glow of the overhead lamp. It offers a clean slate, a blank canvas on which the tangled necklace can be accurately laid out and assessed. The surface’s flatness provides a firm base, preventing the necklace from sliding or moving unexpectedly during the delicate detangling process.
Secure the necklace gently on this surface, taking care not to apply any unnecessary force that could potentially cause damage. Position it in such a way that the entangled area is clearly visible and accessible. The necklace should lie completely flat, its chain spreading out evenly on the surface, revealing its intricate details under the lamp’s subtle glow.
This step’s meticulous execution is essential as it sets the stage for the subsequent detangling process, ensuring optimal visibility and ease of access to the tangled area.
Use a Toothpick
Imagine a chain necklace entangled with stubborn hair strands. To resolve this, gently pick at the strands, like a watchmaker delicately adjusting a timepiece. The toothpick, an unassuming yet effective tool, can be used to gently pry loose the trapped hair, employing precision and patience. Once the liberation process is complete, cleanliness comes into focus. The necklace, now hair-free, needs a thorough cleaning. It’s essential to ensure that all residues from the toothpick and dislodged hair are removed, restoring the necklace to its original lustrous state.
Gently Pick at the Hair Strands to Loosen Them From the Chain
Transitioning from the meticulous layout of the necklace, one finds an intimate dance where precision and care come into play. This delicate ballet involves a toothpick, the silent hero of this procedure, and the stubborn strands of hair entwined within the necklace chain.
The strand of hair, once a symbol of beauty and elegance, now stands as a stubborn intruder entangled in the intricate weave of the necklace chain. It appears almost as a spiderweb, stubbornly clinging to the precious metal links. And like a skilled spider delicately tending to its web, the toothpick must carefully approach the entwined hair strand.
With the necklace laid out, the toothpick takes center stage. The act begins by gently prodding at the hair strands that have ensnared themselves in the necklace’s metallic embrace. The toothpick, in its humble simplicity, becomes an artist’s brush, its tip a gentle force teasing the hair strands away from the chain.
This process, while painstaking, should never be rushed. The intertwined hair must be coaxed, not coerced. Each strand must be given the respect it deserves and treated not as an enemy but as a misplaced guest that must be carefully escorted off the premises. This delicate operation requires patience, precision, and a steady hand.
Using the Toothpick to Gently Pry Hair
Moving from the stage of laying out the necklace, the next crucial step involves the careful manipulation of a toothpick to pry hair strands. The toothpick, a simple yet effective tool, serves as a gentle instrument to dislodge the entangled hair. After carefully selecting a thin and pointed toothpick, the process begins. The toothpick, held with the precision of a surgeon, is cautiously inserted into the tangle of hair ensnared around the delicate necklace chain.
The atmosphere grows silent, the only sound being the quiet breathing of concentration. The toothpick dances lightly around the hair, the hand wielding it exhibiting the same deftness as a maestro commanding a baton. The delicate choreography of the toothpick works to pry, not pull, the hair from its metallic cage, ensuring no damage is inflicted on the precious necklace.
Every subtle twist and turn of the toothpick is a calculated move, a strategic maneuver aimed at gently disengaging the hair from the necklace. The process, though painstaking, is necessary and must be performed with the utmost patience. The toothpick, unassuming in its role, reveals its true importance in the delicate process of necklace cleaning. Through careful execution, the stubborn strands slowly yield, leaving the necklace free from their unwelcome embrace.
Cleaning the Necklace After Using a Toothpick
With the necklace successfully laid out and the hair strands gently dislodged using a toothpick, it’s now time to turn our attention to the crucial task of cleaning the necklace.
After the painstaking process of freeing each hair strand from the necklace’s intricate chain, the necessity for a thorough cleanse becomes paramount. A gentle yet effective cleaning regimen ensures the necklace’s longevity, restoring its original luster and preserving its aesthetic appeal.
Start by preparing a mild, soapy solution in a small bowl. A few drops of a gentle dish soap mixed with warm water often come in handy for this. Ensuring the water is warm, not hot, is crucial to avoid damaging the necklace’s metal or any delicate gemstones it may adorn.
Next, immerse the necklace in this solution, allowing it to sit undisturbed for a few moments. This momentary soak assists in loosening any residual oils or dirt, making them easier to cleanse.
Following this, an old, soft-bristled toothbrush becomes the tool of choice. Using gentle, sweeping strokes, clean the necklace, paying special attention to the areas previously entangled with hair. Finely the necklace under warm, running water and pat it dry with a soft, lint-free cloth, restoring the shine and leaving no traces of the earlier mishap.
Use Tweezers
Impeccably handling hair strands with tweezers requires a gentle yet firm grasp to effectuate extraction. Moving onto a more intricate task, the art of tweezing to disentangle hair from delicate necklace chains necessitates precision and patience. This technique ensures the preservation of both the hair and the jewelry piece. Lastly, safety measures cannot be overlooked when implementing this dexterous task. Ensuring the tweezers are sterile and used correctly prevents potential skin injuries. Thus, when used responsibly, tweezers serve as an invaluable tool for various meticulous tasks.
Carefully Grasp the Hair Strands with the Tweezers and Pull Them Out
Moving on from the toothpick exploration, we now delve into the realm of tweezers, a tool of precision and patience. Tweezers offer a unique advantage when dealing with stubborn hair strands that have found their way into your necklace chain.
Imagine the tweezers as an extension of your fingertips, nimble yet strong, capable of grasping even the most elusive strands. Approach the hair strands with caution and intent. Position the tweezers such that the tips are on either side of the entangled hair. A careful, calculated grasp will prevent any unwanted damage to the necklace.
The hair strands, once trapped within the tweezers’ firm grip, should be gently pulled out. The swift, fluid movement of a practiced hand will ensure the hair strands’ successful extraction without causing harm to the necklace chain. The tautly held hair strand makes a swift exit, leaving behind a clean, hair-free necklace.
Even in the face of frustration, remember to exercise patience. Hastily yanking the hair strands out could lead to a broken necklace or a damaged tweezer tip. In the quiet, meticulous dance between tweezer and hair strand, patience always reigns supreme. This careful technique, when mastered, promises the restoration of your necklace to its original, hairless glory.
Tweezing Technique to Remove Hair From Necklace Chain
Moving beyond the toothpick technique, a more meticulous method involves the use of tweezers. Imagine a pair of sharp, pointed tweezers adeptly maneuvering within the minute cracks and crevices of a necklace chain.
An important strategy when utilizing tweezers to extract hair from a necklace chain involves a steady hand and a keen eye. Begin by isolating the tangled hair strands ensnared in the chain links. Once identified, position the tweezers’ pointed end towards the cluster of hair. The precision of tweezers allows for a more targeted approach than the toothpick.
Now, with a gentle yet firm grip, carefully grasp the hair strands with the tweezers. Avoid tugging or pulling harshly, as this could potentially damage the chain or, in worst-case scenarios, break it. Instead, pull the hair out slowly, maintaining a steady pressure.
Continue this process, methodically moving from one link to the next. The meticulous nature of this task may require patience, but the reward is a clean, hair-free necklace chain. This technique, though time-consuming, ensures the preservation of the jewelry’s integrity and aesthetic appeal. In the world of jewelry maintenance, tweezers indeed prove to be an indispensable tool.
Safety Measures when Using Tweezers
Moving from the precision of a toothpick to the gripping power of tweezers, understanding safe tweezing practices is paramount. Visualize a well-lit workspace with a sturdy table, enabling a clear view of the delicate necklace chain and the pesky hair strands entangled within. Imagine a pair of tweezers in hand, the metallic coolness exuding a sense of control.
Safety while using tweezers is not a topic to be taken lightly. The tweezers’ sharp points can cause harm if not handled with care. Always ensure to grip the tweezers firmly, but not tightly, to avoid any slips that could result in injury. The grip should be secure enough to control the tweezers but loose enough to allow for gentle movements.
Remember to only apply a reasonable amount of pressure when pulling out the hair strands from the necklace chain. Excessive force may not only damage the delicate jewelry but can also potentially cause injury. Furthermore, always disinfect the tweezers before and after use to prevent any potential spread of bacteria or germs.
Finally, in the event of an accidental puncture or scratch, cleanse the wound immediately and seek medical attention if necessary. Keeping a first-aid kit nearby is always a wise precaution.
Apply Baby Oil
To disentangle hair from a necklace chain, a small amount of baby oil can yield surprisingly effective results. This method’s efficacy stems from the oil’s lubricating properties, which ease the hair removal process. However, the technique of applying baby oil is paramount for successful outcomes. Tips for effective application include using a cotton swab for accurate placement, gentle swirling motions to loosen the hair, and a thorough clean-up to prevent residue. Thus, baby oil emerges as a practical solution in intricate situations.
Dab a Small Amount of Baby Oil Onto the Tangled Area to Help Loosen the Hair
Imagine the relief that washes over you when the last knot in a tangled necklace chain finally gives way. Delicate strands of metal, once hopelessly twisted, now fall smoothly and effortlessly. This sensation of triumph can be attained more easily with the aid of a simple household item: baby oil.
Begin by dabbing a minuscule amount of baby oil onto the entangled area of the necklace chain. The oil, which is light and non-sticky, acts as a lubricant, seeping into the most intricate crevices of the chain. It loosens the tightly bound strands, allowing them to glide over each other, reducing the friction that hinders the untangling process.
Applying the oil requires extreme precision. A single drop from the bottle suffices in most cases. Using a cotton swab for this purpose can help control the amount of oil being applied and ensure that it reaches the exact location of the knot.
Patience and a light hand are crucial during this step. Forceful manipulation of the necklace chain could lead to damage. Therefore, after applying the baby oil, allow it a moment to work its magic. The result is a tangle-free necklace chain, restored to its original elegance and beauty.
Effectiveness of Baby Oil in Removing Hair From Necklace Chain
Transitioning from the precise task of employing tweezers, let us delve into the realm of softer approaches. The effectiveness of baby oil in disentangling hair from delicate necklace chains justifies its popularity in this regard.
Baby oil, in its unassuming demeanor, works wonders in freeing the necklace chains from the stubborn grasp of entwined hair. Its slick texture and lubricating properties render it an ideal tool for this task. Where tweezers may struggle to gain a foothold or risk damage to the jewelry, baby oil slides in effortlessly, coaxing the strands to loosen their grip.
The oil, when applied gently, envelopes each strand of hair and seeps into the tiniest crevices of the chain. This creates a slippery environment that disrupts the frictional hold between the hair and the jewelry. Thus, the strands, which once seemed inseparable from the chain, begin to slither out, leaving the necklace free of any hairy encumbrances.
Moreover, baby oil exhibits dual functionality. Not only does it aid in the release of the hair, but it also imparts a glossy sheen to the jewelry, enhancing its aesthetic appeal.
Tips for Applying Baby Oil Effectively
Transitioning from the delicate task of using tweezers, we now approach the stage where baby oil becomes our ally. This common household item has a multitude of uses that extend far beyond baby care. However, the effective application of baby oil requires a certain level of finesse.
Imagine a droplet of dew poised on the edge of a leaf, about to fall. That’s the amount of baby oil needed to start with. More than this could damage the necklace or make the process messier than it needs to be. It’s like adding too much salt to a dish; it’s easier to add more later, if needed, than it is to take it away.
A soft cloth or cotton swab serves as an ideal tool for applying the oil. Picture a painter gently dabbing oil onto a canvas. That’s the level of care required here. The goal is to saturate the tangled area without drenching the entire necklace.
Patience plays a pivotal role in this process. Imagine a clock with its hands moving slowly and steadily. Allow the oil to penetrate the tangles for a few minutes before attempting to untangle them. Rushing this process could lead to further entanglement or damage.
Lastly, it’s vital to rinse and dry the necklace thoroughly post-application.
Use Vinegar
On the journey to untangle hair from a necklace chain, the first stop is immersing the entwined region in a vinegar-warm water concoction, a potent solution for dissolving hair. Then, one navigates the meticulous steps of applying vinegar to extract the ensnared hair. Finally, a detour to the crucial precautions is necessary to ensure the vinegar does not tarnish the jewelry’s pristine condition. This exploration unfolds the miraculous prowess of vinegar, transforming this common kitchen staple into a safe and effective jewelry cleaner.
Soak the Tangled Area in a Mixture of Vinegar and Warm Water to Dissolve the Hair
Transitioning from the oil application, this next phase introduces a household staple that’s about to become a jewelry lifesaver: vinegar. Immersing the tangled area in a concoction of vinegar and warm water makes for an effective solution to dissolve hair entanglements in necklace chains.
The chemistry behind this is simple and intriguing. Vinegar, which is acetic acid, has the ability to cut through the protein structure of the hair, thus loosening it from the necklace. Warm water, on the other hand, aids in the process by softening the hair and making the vinegar more effective.
To put this into practice, create a mixture with equal parts vinegar and warm water in a bowl. The warmth should be just enough to touch comfortably, as overheating may damage the necklace. Place the tangled jewelry into this solution, ensuring that the hair-wrapped area is fully submerged. Let this rest for approximately 15 minutes.
The effervescence and tangy aroma of vinegar mingling with warm water create a vivid visual, while the anticipation of untangling the stubborn hair lock generates an element of suspense. This practical yet fascinating process demonstrates why vinegar is not just for the kitchen but also a trusted ally in jewelry care.
Step-by-Step Guide on Using Vinegar to Get Hair Out of Necklace Chain
Moving away from the oil realm, another practical method to untangle hair from a necklace chain involves the use of an everyday kitchen staple—vinegar. Here’s a detailed step-by-step guide to employing this versatile substance effectively.
Start by preparing a mixture of equal parts white vinegar and warm water in a small bowl. Ensure that the warmth in the water aids in loosening the entangled hair while the vinegar acts as a solvent.
Next, submerge the necklace with the tangled hair into this mixture. Allow the piece to soak for a good 15 to 30 minutes. The idea here is to let the vinegar’s acidic nature work its magic, breaking down the hair protein and reducing the hair’s strength and flexibility.
After the soak, retrieve the necklace from the bowl and gently massage the knotted area with a soft cloth. This action should help dislodge the hair from the chain links.
Finally, rinse the necklace thoroughly under lukewarm water to remove any vinegar residue. Pat it dry with a soft, lint-free cloth.
By following this guide, the process of using vinegar to remove hair from a necklace chain becomes straightforward and effective. It’s a natural and cost-effective solution that promises to restore the accessory’s former glory.
Precautions when Using Vinegar on Jewelry
After the gentle application of baby oil, one might be tempted to leap straight into the vinegar treatment without forethought. However, this could lead to disastrous consequences. Let’s tread cautiously and look into the precautions necessary while using vinegar on jewelry.
Firstly, it is crucial to understand that vinegar is acidic, and its prolonged exposure can damage certain kinds of jewelry. Specifically, precious stones like pearls, opals, or gemstones can lose their luster or even get damaged when soaked in vinegar. Thus, always ensure to remove any such delicate elements before immersing the jewelry piece in the vinegar mixture.
Secondly, keep in mind that vinegar should be used sparingly and in dilution. A mixture of equal parts warm water and vinegar proves most effective without causing damage. A more concentrated solution may yield quicker results, but at the risk of harming the metal.
Lastly, remember that vinegar is not a gentle substance. It is vital to rinse the jewelry thoroughly under lukewarm water after the vinegar treatment, making sure no traces of vinegar remain. And, of course, always pat dry the jewelry piece immediately after rinsing to prevent any water spots or stains.
With these precautions in mind, the use of vinegar can prove an effective tool in the fight against tangled, hair-filled necklace chains.
Rinse and Dry
After thoroughly rinsing the necklace with warm water, a gentle approach is vital for damage prevention. A soft cloth serves as an ideal tool for cradling the delicate chain during the drying process. Pat it dry, ensuring no moisture lingers in the crevices. A careful examination of safe drying techniques is paramount to maintaining the necklace’s integrity. Finally, the right drying tools, including a soft cloth, are indispensable, offering a tender touch to the precious piece.
Rinse the Necklace with Warm Water and Pat It Dry with a Soft Cloth
Transitioning from the vinegar application, the journey of necklace rejuvenation progresses to the next essential step: rinsing and drying. Imagine a calm stream of warm water flowing gently over the necklace, washing away the vinegar solution meticulously. The necklace, once dull and tarnished, now glistens under the cascade, inviting admiration for its renewed sparkle.
Select a soft cloth, as tender and delicate as a mother’s touch. The cloth, preferably made of microfiber, should exhibit both softness and absorbency, qualities that ensure a scratch-free drying process for the precious necklace.
Now, introduce the necklace to the cloth, laying it flat on its surface. With a gentle patting motion, absorb the water droplets clinging stubbornly to the necklace. The task requires a certain level of patience, of course, but the result is a thoroughly dried necklace, shining in all its glory yet safe from any potential water damage.
Bear in mind that the warmth of the water should be just right—not too hot, not too cold. A lukewarm temperature works best, providing a careful cleanse without risking any thermal shock to the necklace. This balanced approach ensures the necklace’s longevity and preserves its aesthetic appeal.
Safe Drying Techniques to Prevent Necklace Damage
Shifting from the vinegar cleaning process, it becomes quite essential to delve into the importance of safe drying procedures, which are crucial in maintaining the integrity of the necklace. Imagine the careful attention and precision necessary to achieve an optimal result; it’s akin to crafting a fine piece of art.
When drying a necklace, avoiding damage becomes paramount. The process should not be rushed; instead, patience becomes a steadfast ally. Never expose the precious jewelry to extreme conditions such as direct sunlight or an artificial source of heat like a hairdryer, for the sudden temperature shift could cause a detrimental impact on the necklace’s material, leading to cracks, discoloration, and even deformation.
Alternatively, it’s recommended to let the necklace air dry in a shaded, well-ventilated area. If time is of essence, a soft, lint-free cloth serves as a gentle and effective drying tool. The cloth should be used to pat the necklace dry, not rub it, as vigorous motions could scratch or tarnish the precious metal.
A piece of jewelry, especially a necklace, is more than just a fashion accessory. It holds sentimental value, and each one tells a unique story. Therefore, maintaining its luster and longevity through safe drying techniques becomes essential. Remember, the goal is not only to clean but also to preserve.
Tools to Use in Drying a Necklace Chain
Transitioning from the vinegar cleaning method, it becomes crucial to master the art of effectively drying a necklace chain to preserve its sheen and integrity. The tools employed in this process can greatly impact the final outcome.
Consider using a soft, lint-free cloth, preferably one made of microfiber, to gently pat the necklace dry. This type of cloth effectively absorbs moisture without scratching or otherwise damaging the delicate surface of the jewelry. It’s a tool that combines efficiency with delicacy, making it the perfect choice for preserving the necklace’s luster.
Alternatively, a jewelry drying stand could be employed. This ingenious contraption allows the necklace to hang freely while it dries, ensuring that no moisture is trapped in the crevices of the chain links. The stand also prevents unnecessary tugging or pulling on the necklace, reducing the risk of accidental damage.
For those interested in a more high-tech solution, a jewelry-specific drying machine presents an enticing proposition. Using a gentle stream of warm air, these machines dry necklaces quickly and evenly without any physical contact, preventing potential abrasion or deformation.
In essence, selecting the right tools for drying a necklace chain can make a significant difference, not only in maintaining its pristine condition but also in prolonging its lifespan.
Store Properly
Safeguard precious ornaments by stowing the necklace in an organized jewelry box or pouch, effectively averting any potential entanglement. A subsequent concern requiring attention, the prevention of hair entanglement during necklace storage, demands careful consideration. Regular maintenance of necklace storage, a crucial aspect of jewelry preservation, ensures a long-lasting shine and longevity. These subtopics fall under the umbrella of ‘Store Properly’, a critical practice for preserving the aesthetic and functional integrity of necklaces.
Store the Necklace in a Jewelry Box or Pouch to Prevent Future Tangling
Gleaming gemstones and lustrous metals, dried and sparkling, are now ready to be tucked away. The secret to extending their longevity lies in the proper storage of these delicate trinkets.
Nestled in a velvet-lined jewelry box or enveloped in a silky pouch, a necklace finds its sanctuary. This not only provides a secure dwelling for it but also shields it from possible entanglements. As chains intertwine, they form intricate knots, challenging to disentangle and risking the integrity of the necklace. A jewelry box, with its separate compartments, ensures each necklace has its own private space, thereby eliminating the possibility of a tangled mess. A soft pouch also serves the same purpose, allowing one necklace per pouch and cushioning it in a cocoon of protection.
Even the most exquisite necklace can lose its charm if it becomes a tangled mass of metal and gemstones. Storing the necklace properly in a jewelry box or pouch can prevent such unfortunate incidents from happening. The preservation of the necklace’s beauty and durability is directly proportional to the care given during storage.
Thus, the simple act of storing a necklace correctly can extend its lifespan, preserving its allure and grandeur for countless future adornments.
Preventing Hair Entanglement in Necklace Storage
Once the necklace sparkles anew, is dried, and is free from any residue, it is time to consider its safekeeping. Imagine a delicate dance where the necklace is the dancer and the safety of its stage is of prime importance.
Preventing hair entanglement in necklace storage can be likened to choreographing this dance. One wrong move, and the beautiful performance descends into chaos. Hair entanglement is a familiar and annoying experience for many, turning the joy of wearing a necklace into a frustrating ordeal. The elegant strands of a necklace can attract hair like a magnet, leading to a tangled mess that can damage both hair and jewelry.
To prevent this, consider using a satin or velvet pouch for storage. These materials are not only soft, but their smooth surfaces also discourage hair from latching onto the necklace. When placing the necklace into the pouch, gently lay it out straight, ensuring no knots or loops form. The pouch should be large enough to allow the necklace to lie flat without coiling or bending, as these can invite entanglement.
Much like how a dancer needs a well-maintained stage for a flawless performance, a necklace requires a well-considered storage solution to remain tangle-free and ready for its next appearance.
Maintenance of Necklace Storage
Transitioning from the rinse and dry process, attention now shifts to the critical aspect of maintaining the storage of the necklace. An aspect that brooks no compromise in ensuring the longevity and pristine condition of the valued accessory.
The upkeep of necklace storage requires a meticulous approach, characterized by regular inspections and cleanings. The interior of the jewelry box or pouch should be kept dust-free and away from moisture, as these environmental factors can degrade the quality of the necklace over time. A soft, dry cloth suffices for wiping away dust particles from the storage unit. For stubborn stains or dirt, a gentle brush can be used.
The lining of the storage box or pouch also demands attention. Ideally, it should be made of soft, non-abrasive material to prevent scratching or damaging the necklace. Checking for any signs of wear and tear in the lining becomes paramount. Any deterioration necessitates immediate replacement.
Furthermore, the storage unit must be kept in a cool, dry place, away from direct sunlight. Extreme temperatures and sunlight can cause discoloration and damage to both the necklace and the storage unit.
In essence, a systematic and consistent maintenance routine preserves the quality of necklace storage, contributing to the overall longevity and aesthetic appeal of the necklace.
Conclusion
In summary, the intricate process of removing hair from a necklace chain calls for patience and precision. Utilizing tools like toothpicks and tweezers in combination with substances like baby oil and vinegar can effectively eliminate the tangled strands.
Proper storage, post-cleaning, is vital to prevent further entanglement. This professional guide provides an efficient way to maintain the luster and beauty of the cherished piece, keeping it free from unwanted hair strands and restoring its original sparkle.